
 Are you ready for the nonstop parties, gatherings, and abundance of cooking and gift giving? While some of us love entertaining, for others it may be a bit stressful. If you need to cut back on your baking, gather your friends and host a cookie exchange. You only have to bake one kind of cookie, but you'll get several dozen to bring to your holiday table.
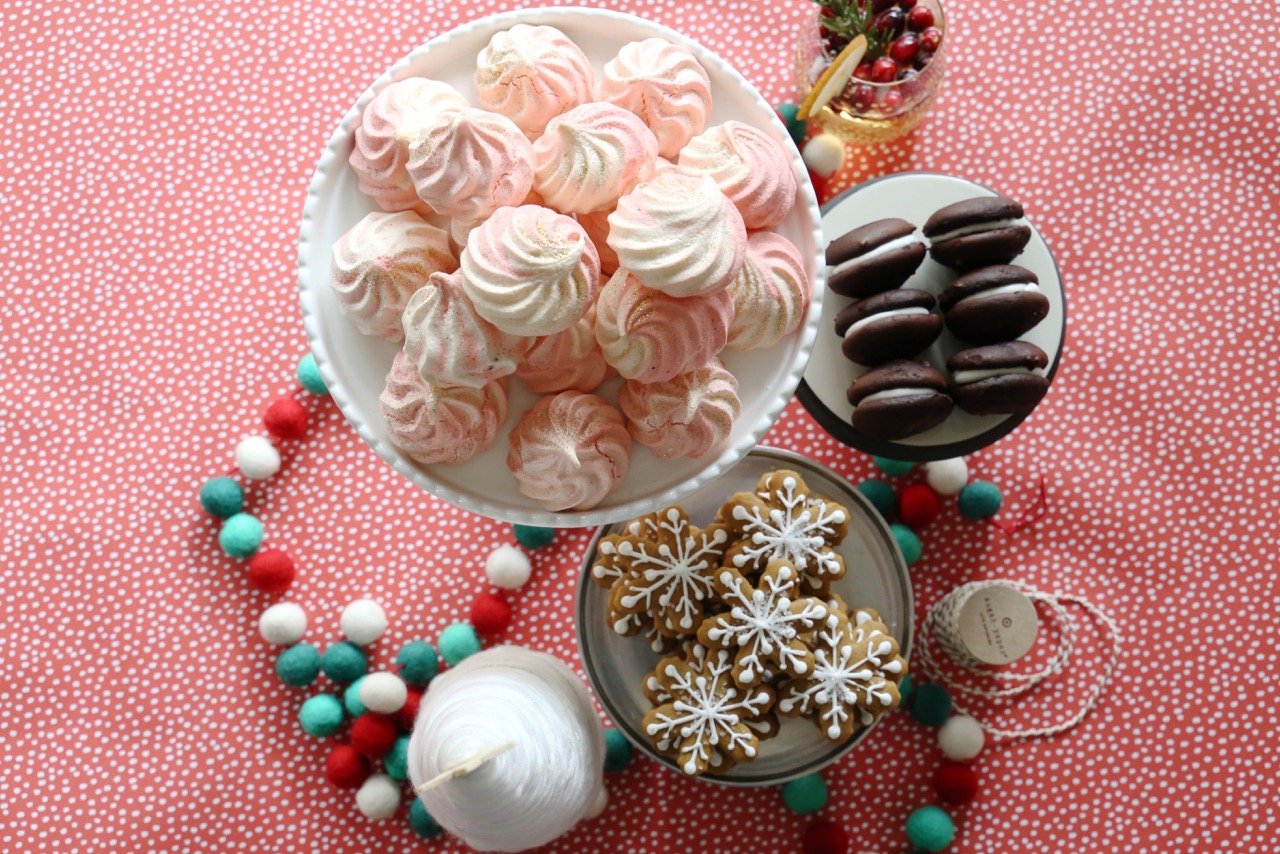
My sister and I started hosting cookie exchanges for our friends several years ago, and we look forward to it every year. The cookies get better and our friends get more creative with the recipes. There is no need to be a professional or invite only friends that are good bakers. Invite the friends you want to share the holidays with. Exchange cookies, enjoys sips and bites, and spread the holiday cheer!
Here are the steps you need to know so that you can host your own Cookie Exchange.
Invitations
Just like any party, you must start with a guest list, set the date and send out the invitation. Choose 10-20 (or more) of your friends who have a sweet tooth like you. For the sake of time, sending an emailed invitations such as an Evite or Paperless Post is perfectly acceptable for this type of gathering. Choose a date for your cookie exchange that is close enough to the holidays so that you can enjoy your assortment of cookies with your family
Cookies
Now it’s time to choose the cookie that you want to bake and share with your friends. You can be a simple or fancy as you would like, but remember you have to bake several dozen to share. The week of your cookie exchange, let your guests know how many people are attending so they can start baking. We recommend each guest bring one type of cookie and bake enough cookies that everyone gets to take 2-3 of each kind. So if you are inviting 12 people have your guests bake and bring 2-3 dozen cookies.
Packaging
Once all the cookies are displayed on the table for everyone to admire, it is time to start swapping. Have a table ready just for packaging up these scrumptious cookies. Boxes for each guest, tissue paper to line the boxes, ribbon and a gift tag will be the perfect way to send your friends off with a beautiful assortment of cookies.
Snacks
Last but not least, make sure you have some savory snacks and cocktails or mocktails for your friends to enjoy. They will not be able to survive just on cookies alone, so 3-4 bite size appetizers and a signature drink for the night is the perfect amount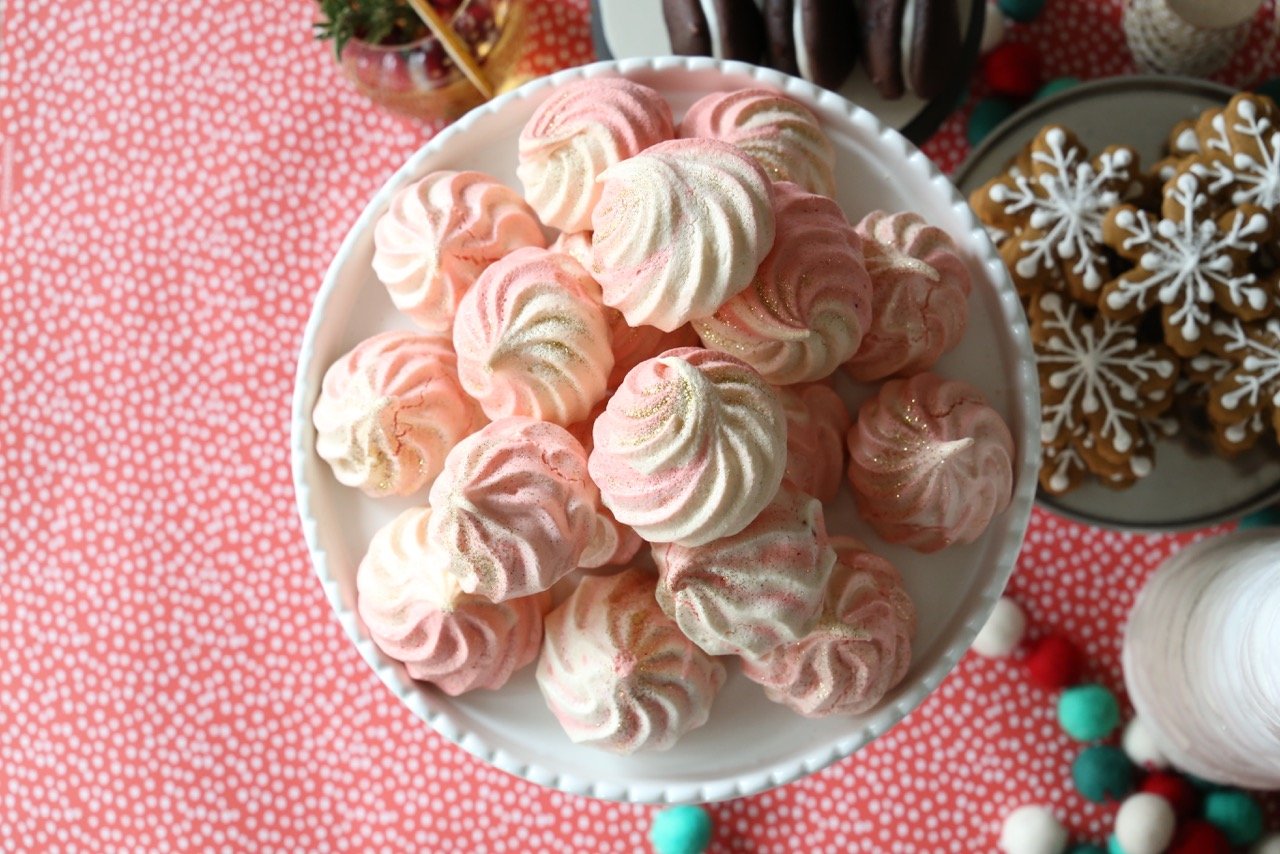
Peppermint Meringue
Ingredients
- 3 Egg Whites
- ¼ tsp cream of tartar
- ¾ Cup Granulated Sugar
- ½ tsp Peppermint Extract
- Red Food Coloring, gel
Instructions
- Preheat oven to 200 degrees F. and line a baking sheet with parchment paper
- In a mixer with whisk attachment, whisk egg whites and cream of tartar on medium speed until foamy and turns into stiff peak
- Reduce the speed on the mixer and slowly add in ½ cup of granulated sugar
- Once the sugar is fully combined and the eggs become a little glossy add in the peppermint extract
- When you have stiff peaks, stop the mixer and gently fold in the remaining ¼ cup of sugar
- Take a ½ of the meringue into another bowl and fold in red food coloring until combined (do not over mix)
- Using a piping bag and a star tip, fill the red meringue on one side of the bag and the white meringue on the other side of the bag and start piping
- Pipe meringue onto prepared baking sheets into 2” cookies
- Bake at 200 degrees F for approximately 1 hour or until the meringue cookies have dried out.
- Remove the meringue from the oven, allow the cookies to cool and store in an air tight container until ready to serve

Chocolate Marshmallow Whoopie Pie
Ingredients
- Chocolate Whoopie Pie
- 2 Cups All Purpose Flour
- ½ Cup Cocoa Powder
- 1 ¼ tsp Baking Soda
- 1 tsp Salt
- 1 Cup Buttermilk
- 1 tsp Vanilla Extract
- 8 Tbsp Unsalted Butter
- 1 Cup Light Brown Sugar
- 1 Egg
- Marshmallow Cream Filling
- 8 Tbsp Unsalted Butter
- 2 Cups Powdered Sugar
- 2 Cups Marshmallow Fluff
- 1 tsp Vanilla Extract
Instructions
Chocolate Whoopie Pie Directions
- Preheat oven to 350 degrees F and line a baking sheet with parchment paper
- Combine flour, cocoa powder, baking soda and salt in a bowl and whisk together
- Cream together butter, brown sugar and vanilla extract until fluffy
- Add egg to butter mixture beat until combined
- Slowly alternate adding flour mixture and buttermilk and beat until smooth
- Scoop 1 tbsp size mounds of batter onto prepared baking sheet
- Bake for 6-8 minutes or until the cookie springs back when you touch it
- Remove the cookies from the oven and cool completely before assembling
Marshmallow Cream Filling Directions
- Beat the butter, powdered sugar, vanilla extract and marshmallow fluff together until smooth. Cover and set aside until ready to use
Whoopie Pie Assembly
- Pipe the marshmallow cream to cover the flat side of one cookie
- Sandwich two chocolate cookies together
- Serve or store in an airtight container


Leave a Reply